As an HVAC technician, you’ll likely encounter many of the same HVAC issues over and over again. To make the most of your time, it’s important to learn how to quickly solve them. Here are solutions to the most common issues you’ll see in the field.
1. Dirty Air Filter
For as easy as changing a dirty filter is, you’d be amazed at how often it comes up. Think of a car with a clogged air filter. The filter is so dirty that it’s restricting airflow into the engine, cutting efficiency, and literally smothering the fuel system. That’s what happens with a dirty HVAC filter.
While homeowners should be changing their HVAC filter monthly, it often gets forgotten. Once the filter is clogged, it begins impeding airflow through the system and if not enough air can make it through, the home isn’t going to be as cool. That’s before considering possible pet dander, pollen, particulates and other allergens that are already circulating through the house.
Bottom line, if a system is performing poorly, the first step should be to check the filter.
2. Evaporator Coils or Dirty Condenser
This is along the same principle as a dirty filter. Think about the roles of a dirty condenser and evaporator coil in the process of heat transfer and cooling:
- The evaporator helps maintain a comfortable humidity level in the home by pulling humidity out of the air and recirculating purified air
- The condenser is what allows the vaporized refrigerant to turn to a liquid again; essentially the reverse of the evaporator
If the coils or fins are dirty it can lead to reduced airflow and even an iced-over system that will inevitably need to be thawed. This type of inefficiency will lead to higher utility bills and can possibly stress other components to the point of failure.
Cleaning Evaporator Coils
Cleaning coils is its own specialty. In some cases, the process can take a few hours to be done properly. Commercial coil cleaning solutions are available to soften up accumulated dust and grime. If you don’t have access to a professional coil cleaning spray, a detergent/water solution can work too.
Use a brush that’s no stiffer than a toothbrush; wire brushes or stiff bristles can cause damage. You can also use compressed air to remove dust and fuzz, but there’s a definite technique to this because you don’t want to drive dust further into the evap coils. In the case of really nasty accumulations of dirt, the system might even have to be shut down or partially disassembled. For a breakdown of evaporators and condensers and the art of cleaning coils check out these courses, taught by long-time HVAC veteran, Tim Smith.
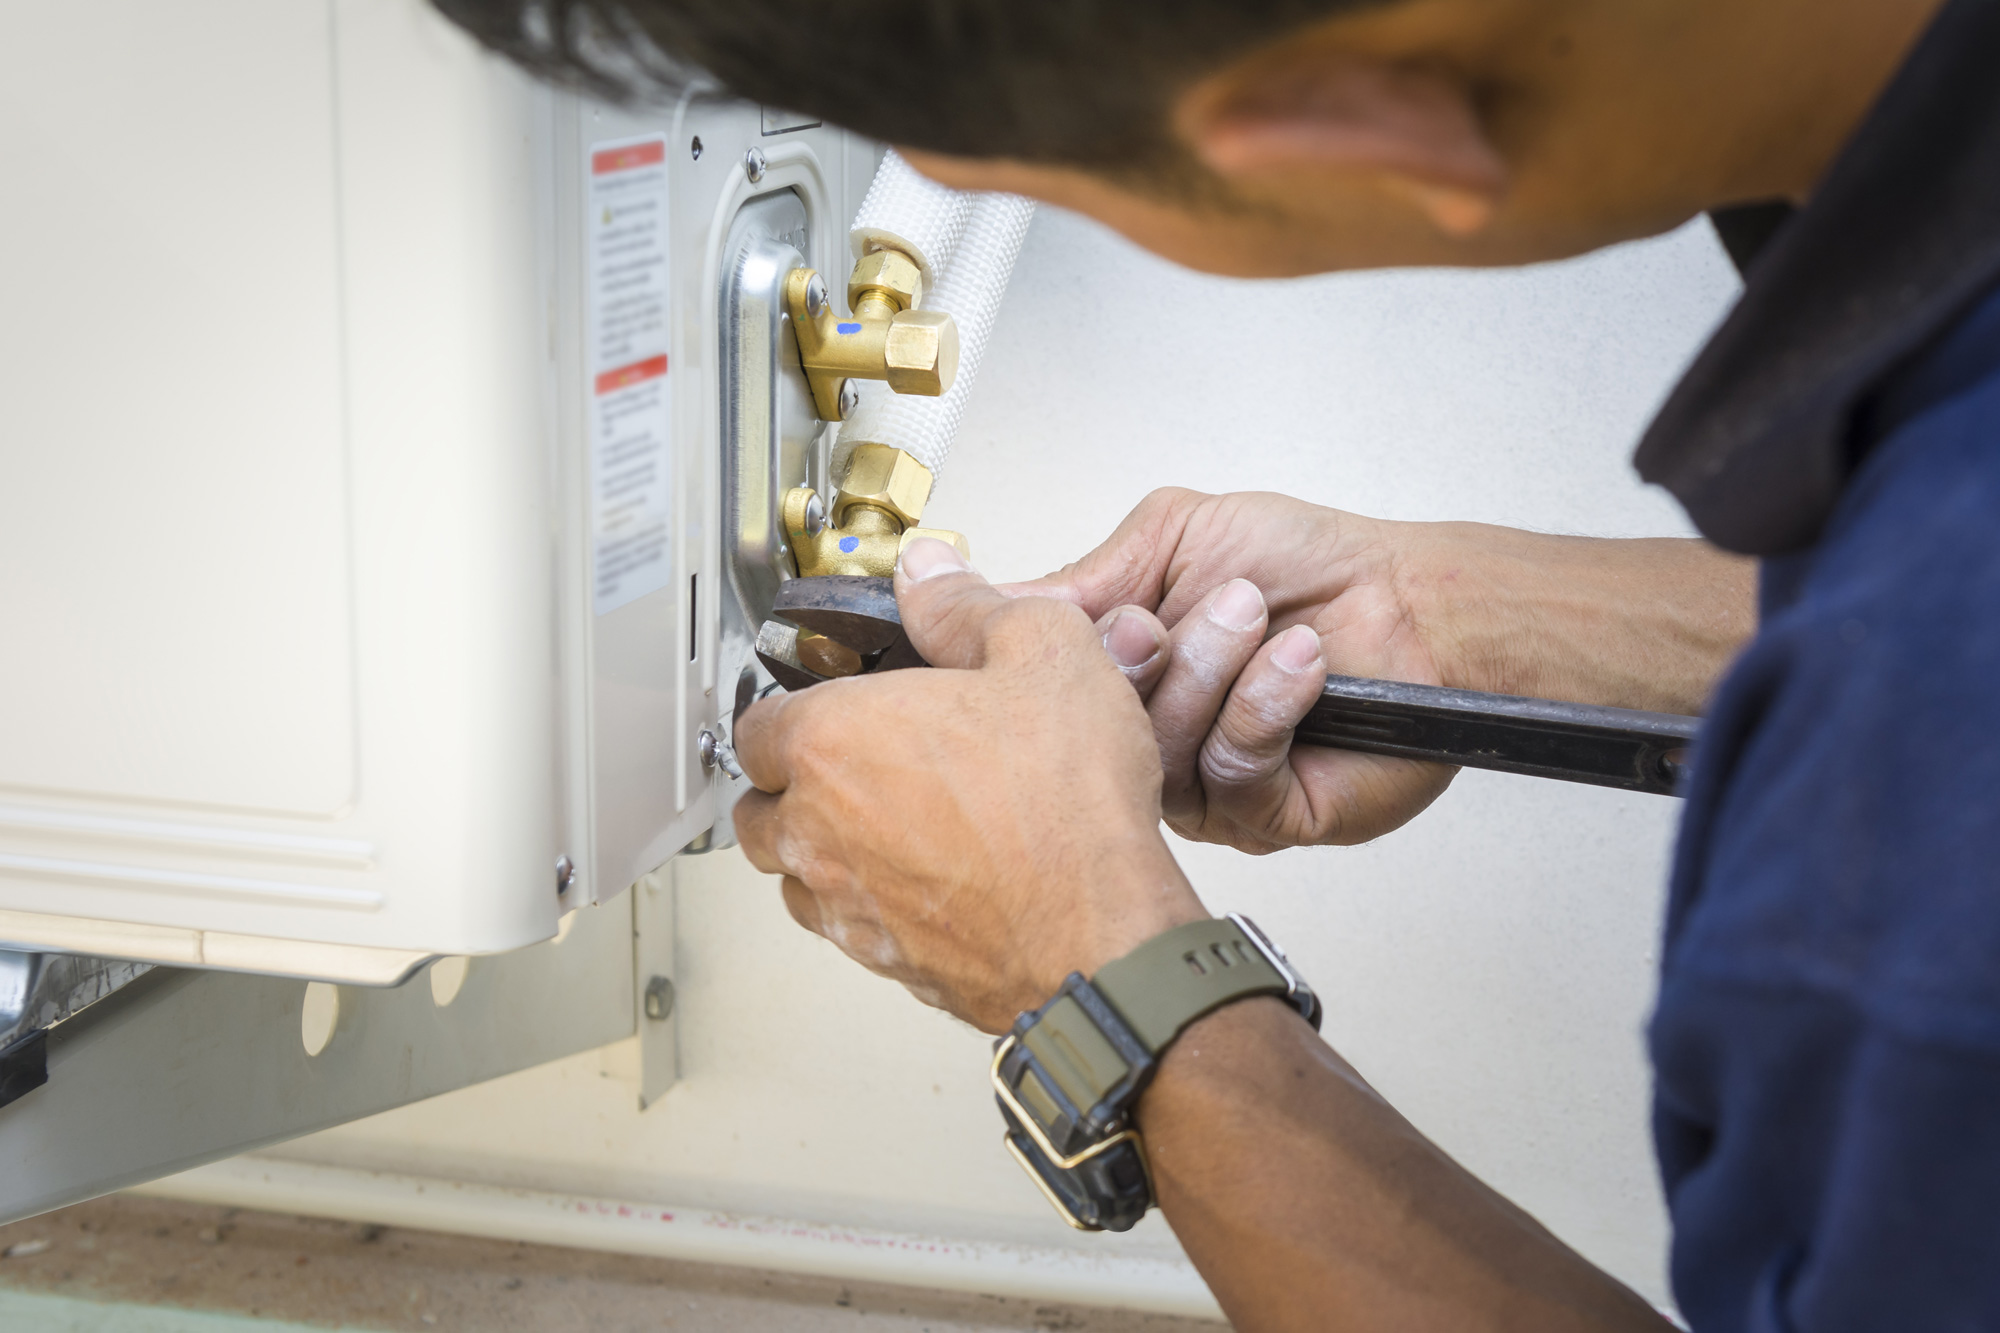
3. Leaking or Low Refrigerant
So, you’ve ruled out a dirty air filter and dirty coils, but the system is still underperforming. The next step is to check refrigerant levels.
Ever ridden in a car where the AC works but not enough to feel comfortable? Chances are it had low refrigerant in the AC system. This is a similar situation with residential HVAC. Here are some signs to look for before hooking up equipment for a reading:
- Excessive amount of condensate water around the unit
- Frost on copper lines and evaporator coil
- Excessive humidity in the home
- System performs poorly and never gets temperature all the way down
If your gauges show a low refrigerant level, you’ll need to isolate and repair any leaks before recharging the system. Leaks can happen anywhere along the circuit where refrigerant flows, but beware, tracking them down can be tricky.
The old-school method of leak detection is to brush on a soapy water mix and look for bubbles, starting with the obvious spots like around brazed joints in the lines, line set fittings and valves. You can also use an electronic leak detector with a bendable probe to track down a really tricky leak. Always begin by inspecting for traces of oil around fittings and joints. Oil residue is a good indicator of the leak location.
If you want to learn more info about leak detection, there’s a really useful online course that covers the 3 methods of leak testing; plus, it guides you through things like choosing the right leak detector and different types of refrigerant to look for.
4. Malfunctioning Thermostat
Another common HVAC problem relates to the thermostat, as the whole system is governed by the thermostat’s controls. The thermostat monitors indoor temperature and kicks the system on or off as needed to keep it at a temperature preset. If your thermostat is set at 75 degrees, but the indoor temperature is 80, the thermostat itself might be the problem. Try resetting the thermostat and see if it’ll control things properly after the reset.
Your next steps in troubleshooting a thermostat should be to ensure there’s power going to it. If so, shut off the power, remove the thermostat’s cover and inspect the wiring for loose connections, corrosion, damage, etc. If everything looks good, use your multimeter to check continuity in the wiring. From this point, things can go a few different ways, especially if you’re dealing with a programmable thermostat. If you’ve got the common issues down, then maybe you’re more interested in solving complex issues on a malfunctioning thermostat.
5. Tripped Breaker or Blown Fuse
Most HVAC systems operate with high current (amperage), and are equipped with a high-amperage breaker in the home’s electrical panel. So, when an HVAC unit isn’t functioning, a tripped breaker or blown fuse can sometimes be the culprit. A breaker doesn’t just trip and shut the system down for no reason.
There can certainly be instances like a lightning strike or a power surge that cause a breaker to trip and shut down the system. That’s why your first step should be to turn the system OFF at the thermostat, then flip the breaker to the ON position and see if it trips again.
It’s important to wait 30 minutes before turning the thermostat back to ON or COOL. This is so that the HVAC’s internal breaker can also reset, and it can’t do that if the thermostat is trying to command the system to cool again.
If the thermostat trips to OFF again, do NOT try a second time. A breaker that continues to shut off may be a sign of a:
- Short in an electrical load
- Short to ground in an electrical load or wiring
- Seized compressor
- Wiring problem, such as a dead short, corrosion, loose connection, animal or insect damage
A situation like this will demand more of your HVAC troubleshooting and repair skills, and you’ll need to be especially safety-conscious in diagnosis and repair since you’ll be working with high voltages. You can get more insight on tracking down and isolating these types of HVAC problems with this series of residential a/c troubleshooting videos .